Hercules and Slackware (slack/390) - Part 10
...Continuing from Part 9
Configuring our installation
After installing all the selected packages, the setup program takes us to the configuration item of the menu.
1) Kernel parameters
First we can add any necessary boot parameters. Remember that these are roughly equivalent to the parameters you normally put in your /etc/lilo.conf file:
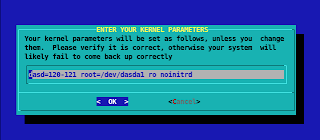
What we define here is:
- where to find our storage devices (dasd=120-121)
- where to find our root partition (root=/dev/dasda1)
- to mount root as read-only first (ro)
- that we won't use an initial RAM disk (noinitrd)
Normally you do not need to change these parameters, so just press Enter here.
2) Select a kernel
We are given a list of possible kernels to boot (roughly equivalent to our menu options in lilo):
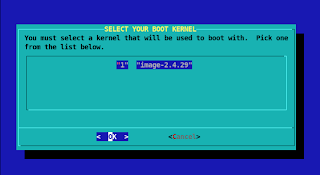
Well, we just have one kernel for now, so just press Enter again...
3) Disabling hotplug
We are now asked if we want to enable the hotplug subsystem:

As the text explains, this is very useful for USB and cardbus devices, soundcards, etc. But I haven't seen any mainframe up to now that uses anything like this, so it's better to choose '< No >' here and press Enter.
4) Mouse selection
Now we're asked about the type of mouse on our mainframe:
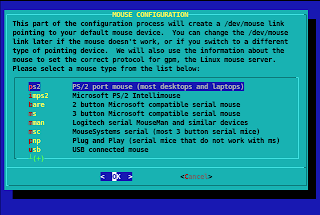
Again, I still have to find a mainframe with a mouse connected to it, but we have no option to skip this item.
So let's just press Enter to accept the default option.
5) GPM Configuration
The setup program now suggests configuring Slack/390 to load GPM, the console mouse driver:
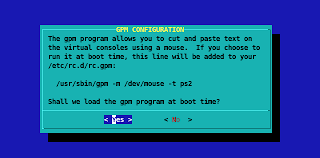
It is important to select '< No >' here, as loading gpm after booting in Hercules can cause an Oops message and result in an unstable system.
So select No and press Enter.
6) Network configuration
We now go to the step of configuring our network:

Press Enter here to enter the configuration options.
First we'll enter the hostname of our system:
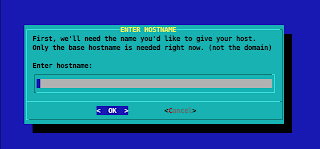
I selected 'herc-slack' but feel free to choose whatever you like.
Next we're asked for the name of our domain:
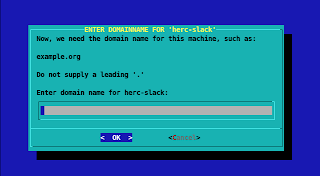
Use the same name you entered in your 'parmfile.txt'in the beginning.
Now we decide if we want a static or dynamic IP address:
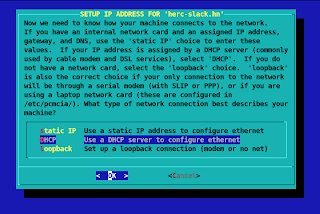
Well, I've never seen a mainframe with a dynamic address, so I selected 'static IP'.
The next item, the IP address, is filled in for us from the step where we configured the network to mount the NFS exported files:
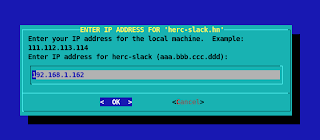
Unless you want to change the IP address for your next boot, just press Enter here.
The netmask is also filled in for us:
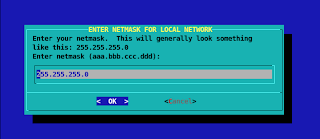
Again, press Enter to accept the value.
The address of our gateway is also remembered by the setup program:
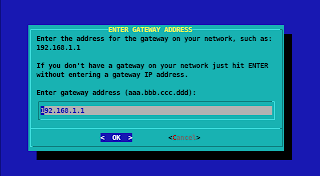
Here we also press Enter to accept the proposed value.
Now we get to the part of configuring a name server:

I suggest configuring a nameserver, so that you can access the internet without problems from your mainframe.
Get the address of the nameserver of your ISP or your local network.
Hint: check your local /etc/resolv.conf file
Enter the IP address of your nameserver in the following screen:
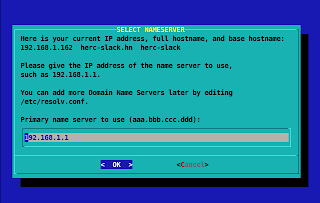
I used the IP address of my DSL-modem, which is also a nameserver.
If you're not sure what to fill in right now, don't worry. You can manually change your /etc/resolv.conf file later.
The next screen shows everything we entered and gives us the options to accept our choices, edit a line or start the network configuration all over:
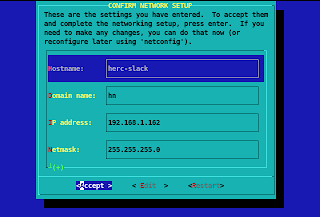
If you're OK with your options, select '< Accept >' and press Enter to go to the next step.
7) Startup services
Now we choose which services we want to run on startup:
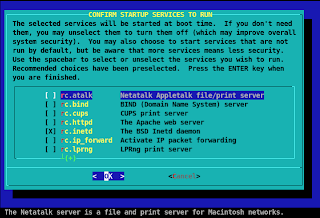
I would suggest to deselect 'rc.sendmail' from the list, unless you really want to run mail services on your emulated mainframe.
Remember that you can later select services to start up at boot time by making them executable in /etc/rc.d with the 'chmod +x rc.xxxxxxxx' command.
Select '< OK >' after verifying your options and press Enter.
8) Custom screen fonts
The next question is about custom screen fonts:

But since we'll be accessing our mainframe via ssh sessions, we'll just select '< No >' here.
9) Clock and timezone settings
Now we're asked if the hardware clock of our computer is set to local time or UTC/GMT:
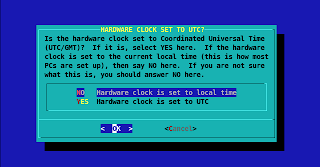
This question is asked to determine how Slack/390 should read the hardware clock when starting up to set the date and time of your system.
When shutting down, Slack/390 tries to update the hardware clock, but Hercules won't let it do so.
Select 'NO' to define the hardware clock as representing local time.
You might have to play around with the TZOFFSET parameter in your hercules.cnf file if things are not the way you expected.
Now we will have to select our timezone:
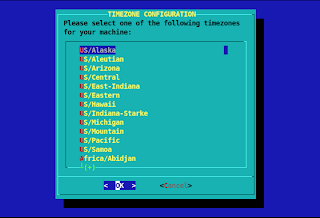
I live in the south-east of Brazil, so I select 'America/Sao_Paulo', but do select what suits you best.
10) Root password
The setup program detects that we do not have a password for the root account yet, which is never a good idea:
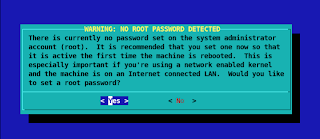
Press Enter to set a password for the system administrator.
We're changing to a text screen to enter the new password:
Enter your password and re-enter it to confirm.
The system will return with the following message:
11) Setup is complete... almost...
The following screen shows that setup is complete:
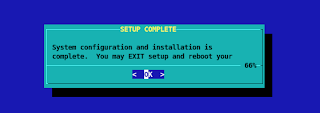
Press Enter to return to the menu and exit the setup program, but do not reboot just yet!
You'll get the following message on your telnet session:
But some essential information is missing, and if you shutdown now, your installation won't start the network we configured.
Next post: Final configuration and IPLing our new installed Slack/390!
Configuring our installation
After installing all the selected packages, the setup program takes us to the configuration item of the menu.
1) Kernel parameters
First we can add any necessary boot parameters. Remember that these are roughly equivalent to the parameters you normally put in your /etc/lilo.conf file:

What we define here is:
- where to find our storage devices (dasd=120-121)
- where to find our root partition (root=/dev/dasda1)
- to mount root as read-only first (ro)
- that we won't use an initial RAM disk (noinitrd)
Normally you do not need to change these parameters, so just press Enter here.
2) Select a kernel
We are given a list of possible kernels to boot (roughly equivalent to our menu options in lilo):

Well, we just have one kernel for now, so just press Enter again...
3) Disabling hotplug
We are now asked if we want to enable the hotplug subsystem:

As the text explains, this is very useful for USB and cardbus devices, soundcards, etc. But I haven't seen any mainframe up to now that uses anything like this, so it's better to choose '< No >' here and press Enter.
4) Mouse selection
Now we're asked about the type of mouse on our mainframe:

Again, I still have to find a mainframe with a mouse connected to it, but we have no option to skip this item.
So let's just press Enter to accept the default option.
5) GPM Configuration
The setup program now suggests configuring Slack/390 to load GPM, the console mouse driver:

It is important to select '< No >' here, as loading gpm after booting in Hercules can cause an Oops message and result in an unstable system.
So select No and press Enter.
6) Network configuration
We now go to the step of configuring our network:

Press Enter here to enter the configuration options.
First we'll enter the hostname of our system:

I selected 'herc-slack' but feel free to choose whatever you like.
Next we're asked for the name of our domain:

Use the same name you entered in your 'parmfile.txt'in the beginning.
Now we decide if we want a static or dynamic IP address:

Well, I've never seen a mainframe with a dynamic address, so I selected 'static IP'.
The next item, the IP address, is filled in for us from the step where we configured the network to mount the NFS exported files:

Unless you want to change the IP address for your next boot, just press Enter here.
The netmask is also filled in for us:

Again, press Enter to accept the value.
The address of our gateway is also remembered by the setup program:

Here we also press Enter to accept the proposed value.
Now we get to the part of configuring a name server:

I suggest configuring a nameserver, so that you can access the internet without problems from your mainframe.
Get the address of the nameserver of your ISP or your local network.
Hint: check your local /etc/resolv.conf file
Enter the IP address of your nameserver in the following screen:

I used the IP address of my DSL-modem, which is also a nameserver.
If you're not sure what to fill in right now, don't worry. You can manually change your /etc/resolv.conf file later.
The next screen shows everything we entered and gives us the options to accept our choices, edit a line or start the network configuration all over:

If you're OK with your options, select '< Accept >' and press Enter to go to the next step.
7) Startup services
Now we choose which services we want to run on startup:

I would suggest to deselect 'rc.sendmail' from the list, unless you really want to run mail services on your emulated mainframe.
Remember that you can later select services to start up at boot time by making them executable in /etc/rc.d with the 'chmod +x rc.xxxxxxxx' command.
Select '< OK >' after verifying your options and press Enter.
8) Custom screen fonts
The next question is about custom screen fonts:

But since we'll be accessing our mainframe via ssh sessions, we'll just select '< No >' here.
9) Clock and timezone settings
Now we're asked if the hardware clock of our computer is set to local time or UTC/GMT:

This question is asked to determine how Slack/390 should read the hardware clock when starting up to set the date and time of your system.
When shutting down, Slack/390 tries to update the hardware clock, but Hercules won't let it do so.
Select 'NO' to define the hardware clock as representing local time.
You might have to play around with the TZOFFSET parameter in your hercules.cnf file if things are not the way you expected.
Now we will have to select our timezone:

I live in the south-east of Brazil, so I select 'America/Sao_Paulo', but do select what suits you best.
10) Root password
The setup program detects that we do not have a password for the root account yet, which is never a good idea:

Press Enter to set a password for the system administrator.
We're changing to a text screen to enter the new password:
Changing password for root
Enter the new password (minimum of 5, maximum of 127 characters)
Please use a combination of upper and lower case letters and numbers.
New password:
Enter your password and re-enter it to confirm.
The system will return with the following message:
Password changed.

Press [enter] to continue:
11) Setup is complete... almost...
The following screen shows that setup is complete:

Press Enter to return to the menu and exit the setup program, but do not reboot just yet!
You'll get the following message on your telnet session:
Installation of Slackware Linux is complete.

You may now press ctrl-alt-delete to reboot.
But some essential information is missing, and if you shutdown now, your installation won't start the network we configured.
Next post: Final configuration and IPLing our new installed Slack/390!
posted by niels.horn at
22:14
![]()

0 Comments:
Post a Comment
Subscribe to Post Comments [Atom]
<< Home