Hercules and Slackware (slack/390) - Part 8
...Continuing from Part 7
Selecting the source
Now we need to inform the setup program where it can find the packages to install. The menu gives us the following options:
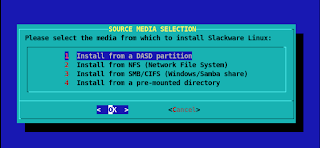
As explained before, we'll use the option to install from NFS, so select option 2 and the next question is asked:
1) Confirming our local network configuration
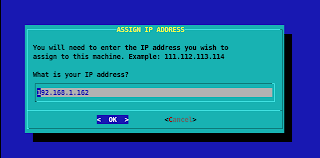
The IP address we defined in our 'parmfile.txt' is used as default, so we can just press Enter here and continue with the next question:
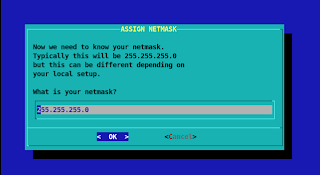
Again, the netmask we used in the 'parmfile' is given as a default, so we'll just press Enter again to continue:

In our example we defined a gateway in 'parmfile.txt' so we can choose '< Yes >', but if you do not have a gateway, you can choose '< No >'.
If you choose Yes, you'll have to fill in the address of your gateway:
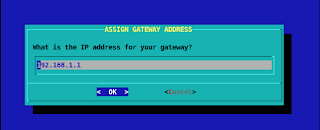
Press Enter to accept the default from 'parmfile.txt', or type in the IP address of your gateway.
Now that we confirmed our local network configuration, we'll go to the next step.
2) Defining the exported NFS to mount
The first question is the IP address of the server where you saved the packages:
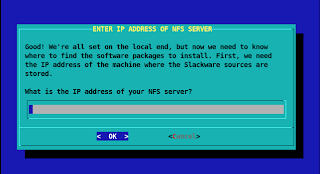
I saved the packages on my host computer, so I'll put its IP address here. Fill in this field with the correct address for your installation and press Enter.
Now we'll have to inform the setup program the exact location of the directory with the packages on the server:
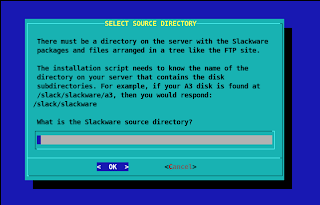
This would be (download)/slackware where you need to substitute '(download)' with the correct path. Be careful to type the path exactly as you defined it in your /etc/exports file.
Press Enter to test is the setup program can mount the exported directory. The result should be something similar to this output:
Check if the last line in the displayed mount table shows your download directory on the NFS server mounted in your emulated mainframe.
If anything went wrong, press 'y' to try other settings.
If all is well, press 'n'.
Next post: Package selection!
Selecting the source
Now we need to inform the setup program where it can find the packages to install. The menu gives us the following options:

As explained before, we'll use the option to install from NFS, so select option 2 and the next question is asked:
1) Confirming our local network configuration

The IP address we defined in our 'parmfile.txt' is used as default, so we can just press Enter here and continue with the next question:

Again, the netmask we used in the 'parmfile' is given as a default, so we'll just press Enter again to continue:

In our example we defined a gateway in 'parmfile.txt' so we can choose '< Yes >', but if you do not have a gateway, you can choose '< No >'.
If you choose Yes, you'll have to fill in the address of your gateway:

Press Enter to accept the default from 'parmfile.txt', or type in the IP address of your gateway.
Now that we confirmed our local network configuration, we'll go to the next step.
2) Defining the exported NFS to mount
The first question is the IP address of the server where you saved the packages:

I saved the packages on my host computer, so I'll put its IP address here. Fill in this field with the correct address for your installation and press Enter.
Now we'll have to inform the setup program the exact location of the directory with the packages on the server:

This would be (download)/slackware where you need to substitute '(download)' with the correct path. Be careful to type the path exactly as you defined it in your /etc/exports file.
Press Enter to test is the setup program can mount the exported directory. The result should be something similar to this output:
We'll switch into text mode here so you can see if you have any errors.

Configuring ethernet card...
Configuring your gateway...
Running /sbin/rpc.portmap...
Mounting NFS...

Current mount table:
/dev/ram0 on / type ext2 (rw)
none on /proc type proc (rw)
/dev/pts on /dev/pts type devpts (rw)
/dev/dasda1 on /mnt type ext2 (rw)
/dev/dasdb1 on /mnt/home type ext2 (rw)
192.168.1.110:/var/download/slack390/slackware on /var/log/mount type nfs (ro,nolock,addr=192.168.1.110)

(If you see errors above and the mount table doesn't show your NFS
server, then try setting up NFS again)

Do you need to try setting up NFS again ([y]es, [n]o)?
Check if the last line in the displayed mount table shows your download directory on the NFS server mounted in your emulated mainframe.
If anything went wrong, press 'y' to try other settings.
If all is well, press 'n'.
Next post: Package selection!


0 Comments:
Post a Comment
Subscribe to Post Comments [Atom]
<< Home