Saturday, November 22, 2008

Hercules and Slackware (slack/390) - Part 11

...Continuing from Part 10

Final configuration and IPLing Slack390

The setup program configured our network, but missed some important details we need to get our network up and running.

1) Loading the network adapter kernel module at boot time

Since we selected to use the LCS we need to load the kernel module that supports it.
This is done by editing the /etc/rc.d/rc.modules file.
I personally prefer VI as an editor, but use whatever you're more familiar with (and is available in our limited 'live'-system).
If you use VI, search for 'lcs' (hint: open the file with 'vi /etc/rc.d/rc.modules' and type '/lcs' + Enter - it's at line 69) and remove the '#' at the beginning of the line that reads:
#/sbin/modprobe lcs
(hint: press 'Home' to go to the beginning of the line, 'd' + 'space' to delete the '#')

Now save the modified file (hint: press ':' + 'wq' + Enter)

2) Setting the options for the lcs kernel module

We also need to tell the lcs kernel module the device number of our emulated LCS.
So we create a /etc/modprobe.conf file with the needed information by typing this line:
echo "options lcs 0xf00,1" > /etc/modprobe.conf

3) Repeating the chandev information from parmfile.txt

To finish, we need to create the /etc/chandev.conf file with the information we put in our original parmfile.txt:
echo "lcs0,0xf00,0xf01" > /etc/chandev.conf

4) Shutdown our system

Now everything is ready to shutdown our running system, so just enter:
halt
and press Enter.

Our telnet session will be closed so we'll change to the Hercules console, where we'll see the following lines:


Now quit from Hercules to guarantee a clean start by typing 'quit' after the Commmand ==> prompt.

5) IPLing our Slack/390 installation for the first time

Start Hercules again and IPL from the first DASD (device number 0120) by typing 'ipl 120' after the Commmand ==> prompt.

Since we selected to start the SSH daemon at boot time, Slack/390 will create three public / private key pairs, one each for rsa1, dsa and rsa.
This will take some time (especially the dsa key pair), depending on your processing power (like 10 to 30 minutes).
You'll see - amongst others - the following lines on the Hercules console:

Starting OpenSSH SSH daemon: /usr/sbin/sshd
Generating public/private rsa1 key pair.
Generating public/private dsa key pair.
Generating public/private rsa key pair.

This only occurs the first time you IPL your Slack/390. All the other times it will be a lot faster.

The last line on the Hercules console will be:
bash-3.00#

This means that Slack/390 was loaded and is ready to receive connections.

6) Connecting to your Slack/390 system

Now go back to your normal console on your host system.
For security reasons, telnet sessions are not allowed, so we'll have to use ssh from now on.
Connect to your Slack/390 system from your host system (or any other system on your network) with the following command:
ssh root@192.168.1.162

The first time you connect to your new Slack/390 system you'll see the following lines:

The authenticity of host '192.168.1.162 (192.168.1.162)' can't be established.
RSA key fingerprint is df:27:56:56:4b:c3:30:aa:c5:dc:94:2e:21:93:c3:af.
Are you sure you want to continue connecting (yes/no)?

Simply answer 'yes' to continue and you'll see these lines:

Warning: Permanently added '192.168.1.162' (RSA) to the list of known hosts.
root@192.168.1.162's password:

Enter the password for root you defined and you'll get this prompt:

Linux 2.4.29.
root@herc-slack:~#

Congratulations! You finished installing Slack/390 on your (emulated) mainframe!

7) Where to go from here

First of all, create a normal user with 'adduser' so that you don't have to use root to login to your mainframe.

And then? Well, depending on your processing power, there are many fun things to do, like configuring the http daemon to run a webserver on your mainframe, with mysql. Or configure samba, so that you can access it from Windows desktops.

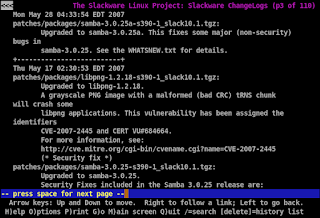
Or start browsing the web with lynx to check for updates of Slack/390:


Oh, but you complain that there are no graphics?
We have graphics on our mainframe! Just enter 'info aalib' and you'll see what I mean:

Labels: , , ,

Friday, November 21, 2008

Hercules and Slackware (slack/390) - Part 10

...Continuing from Part 9

Configuring our installation

After installing all the selected packages, the setup program takes us to the configuration item of the menu.

1) Kernel parameters

First we can add any necessary boot parameters. Remember that these are roughly equivalent to the parameters you normally put in your /etc/lilo.conf file:


What we define here is:
- where to find our storage devices (dasd=120-121)
- where to find our root partition (root=/dev/dasda1)
- to mount root as read-only first (ro)
- that we won't use an initial RAM disk (noinitrd)

Normally you do not need to change these parameters, so just press Enter here.

2) Select a kernel

We are given a list of possible kernels to boot (roughly equivalent to our menu options in lilo):


Well, we just have one kernel for now, so just press Enter again...

3) Disabling hotplug

We are now asked if we want to enable the hotplug subsystem:


As the text explains, this is very useful for USB and cardbus devices, soundcards, etc. But I haven't seen any mainframe up to now that uses anything like this, so it's better to choose '< No >' here and press Enter.

4) Mouse selection

Now we're asked about the type of mouse on our mainframe:


Again, I still have to find a mainframe with a mouse connected to it, but we have no option to skip this item.
So let's just press Enter to accept the default option.

5) GPM Configuration

The setup program now suggests configuring Slack/390 to load GPM, the console mouse driver:


It is important to select '< No >' here, as loading gpm after booting in Hercules can cause an Oops message and result in an unstable system.
So select No and press Enter.

6) Network configuration

We now go to the step of configuring our network:


Press Enter here to enter the configuration options.

First we'll enter the hostname of our system:


I selected 'herc-slack' but feel free to choose whatever you like.

Next we're asked for the name of our domain:


Use the same name you entered in your 'parmfile.txt'in the beginning.

Now we decide if we want a static or dynamic IP address:


Well, I've never seen a mainframe with a dynamic address, so I selected 'static IP'.

The next item, the IP address, is filled in for us from the step where we configured the network to mount the NFS exported files:


Unless you want to change the IP address for your next boot, just press Enter here.

The netmask is also filled in for us:


Again, press Enter to accept the value.

The address of our gateway is also remembered by the setup program:


Here we also press Enter to accept the proposed value.

Now we get to the part of configuring a name server:


I suggest configuring a nameserver, so that you can access the internet without problems from your mainframe.
Get the address of the nameserver of your ISP or your local network.
Hint: check your local /etc/resolv.conf file

Enter the IP address of your nameserver in the following screen:


I used the IP address of my DSL-modem, which is also a nameserver.
If you're not sure what to fill in right now, don't worry. You can manually change your /etc/resolv.conf file later.

The next screen shows everything we entered and gives us the options to accept our choices, edit a line or start the network configuration all over:


If you're OK with your options, select '< Accept >' and press Enter to go to the next step.

7) Startup services

Now we choose which services we want to run on startup:


I would suggest to deselect 'rc.sendmail' from the list, unless you really want to run mail services on your emulated mainframe.
Remember that you can later select services to start up at boot time by making them executable in /etc/rc.d with the 'chmod +x rc.xxxxxxxx' command.

Select '< OK >' after verifying your options and press Enter.

8) Custom screen fonts

The next question is about custom screen fonts:


But since we'll be accessing our mainframe via ssh sessions, we'll just select '< No >' here.

9) Clock and timezone settings

Now we're asked if the hardware clock of our computer is set to local time or UTC/GMT:


This question is asked to determine how Slack/390 should read the hardware clock when starting up to set the date and time of your system.
When shutting down, Slack/390 tries to update the hardware clock, but Hercules won't let it do so.

Select 'NO' to define the hardware clock as representing local time.
You might have to play around with the TZOFFSET parameter in your hercules.cnf file if things are not the way you expected.

Now we will have to select our timezone:


I live in the south-east of Brazil, so I select 'America/Sao_Paulo', but do select what suits you best.

10) Root password

The setup program detects that we do not have a password for the root account yet, which is never a good idea:


Press Enter to set a password for the system administrator.

We're changing to a text screen to enter the new password:

Changing password for root
Enter the new password (minimum of 5, maximum of 127 characters)
Please use a combination of upper and lower case letters and numbers.
New password:

Enter your password and re-enter it to confirm.

The system will return with the following message:

Password changed.

Press [enter] to continue:


11) Setup is complete... almost...

The following screen shows that setup is complete:


Press Enter to return to the menu and exit the setup program, but do not reboot just yet!

You'll get the following message on your telnet session:

Installation of Slackware Linux is complete.

You may now press ctrl-alt-delete to reboot.


But some essential information is missing, and if you shutdown now, your installation won't start the network we configured.

Next post: Final configuration and IPLing our new installed Slack/390!

Labels: , , ,

Hercules and Slackware (slack/390) - Part 9

...Continuing from Part 8

Selecting packages to install

We now arrived at the task of deciding exactly which packages we want to install.

1) Package series selection

Slackware (and Slack/390) organizes its packages in 'series'. This comes from the old days, when we installed Slackware from floppy disks.
We are shown a menu with all series that we downloaded, each with a small description:


With the '+' and '-' keys you can scroll through the list and read the last line on your telnet session for more information.

I suggest installing the recommended series and just deselecting the GNOME / KDE and KDEI series if you downloaded them. Select / Deselect a series with 'space'.
You definitely should not deselect the 'A' (Base), 'AP' (Applications), 'L' (Libraries) or 'N' (Networking) series.
Press Enter when you're satisfied with your selection.

2) Prompting mode

Now we have the option how we are going to select individual packages in the series:


I suggest selecting 'full' to avoid problems.
Only select 'expert' is you really are an expert. The problems you might create by skipping an individual package are not worth the space you save. In my experience of over a decade as a Slackware user I have seen too many users selecting individual packages running into problems later on.

Select your option and press Enter to start the installation!

3) Installation

First we'll see a confirmation that the installation has started:


Then every individual package is installed and shown:


4) Sit back and relax

Get some coffee, lunch, dinner, get some sleep...
Because this part of installing all packages may take some hours, depending on your host system, available memory, processing power, network connection etc.

In my case, with the downloaded files on the host computer where Hercules is running, it took some three hours for a full install.

There are some very important steps in the next phase of configuring, so pay attention when the installation of all selected packages is finished.


Next post: Configure your installation!

Labels: , , ,

Hercules and Slackware (slack/390) - Part 8

...Continuing from Part 7

Selecting the source

Now we need to inform the setup program where it can find the packages to install. The menu gives us the following options:


As explained before, we'll use the option to install from NFS, so select option 2 and the next question is asked:

1) Confirming our local network configuration


The IP address we defined in our 'parmfile.txt' is used as default, so we can just press Enter here and continue with the next question:


Again, the netmask we used in the 'parmfile' is given as a default, so we'll just press Enter again to continue:


In our example we defined a gateway in 'parmfile.txt' so we can choose '< Yes >', but if you do not have a gateway, you can choose '< No >'.

If you choose Yes, you'll have to fill in the address of your gateway:


Press Enter to accept the default from 'parmfile.txt', or type in the IP address of your gateway.

Now that we confirmed our local network configuration, we'll go to the next step.

2) Defining the exported NFS to mount

The first question is the IP address of the server where you saved the packages:


I saved the packages on my host computer, so I'll put its IP address here. Fill in this field with the correct address for your installation and press Enter.

Now we'll have to inform the setup program the exact location of the directory with the packages on the server:


This would be (download)/slackware where you need to substitute '(download)' with the correct path. Be careful to type the path exactly as you defined it in your /etc/exports file.

Press Enter to test is the setup program can mount the exported directory. The result should be something similar to this output:

We'll switch into text mode here so you can see if you have any errors.

Configuring ethernet card...
Configuring your gateway...
Running /sbin/rpc.portmap...
Mounting NFS...

Current mount table:
/dev/ram0 on / type ext2 (rw)
none on /proc type proc (rw)
/dev/pts on /dev/pts type devpts (rw)
/dev/dasda1 on /mnt type ext2 (rw)
/dev/dasdb1 on /mnt/home type ext2 (rw)
192.168.1.110:/var/download/slack390/slackware on /var/log/mount type nfs (ro,nolock,addr=192.168.1.110)

(If you see errors above and the mount table doesn't show your NFS
server, then try setting up NFS again)

Do you need to try setting up NFS again ([y]es, [n]o)?

Check if the last line in the displayed mount table shows your download directory on the NFS server mounted in your emulated mainframe.
If anything went wrong, press 'y' to try other settings.
If all is well, press 'n'.


Next post: Package selection!

Labels: , , ,

Hercules and Slackware (slack/390) - Part 7

...Continuing from Part 6

Starting setup

After formatting and partitioning our storage, we're ready to enter Slack/390's setup program.
In your telnet session simply enter:
# setup

and the following screen will appear:


Again, experienced Slackware users will recognize this screen from previous installations.

Note
The arrow keys did not work for me via telnet, but you can use the '+', '-' and 'tab' keys to navigate the menu.

You can read the Help section if you like now. It is the original version for Slackware, not adapted for Slack/390, so some details are inaccurate. But most generic info is true for all installations, so if you are not in too much of a hurry, take a look.

We'll skill setting up a swap partition, as we did not create one.

1) Setting up our target partitions

First we have to inform the installer where we want to install Slack/390.
We created two virtual DASDs, and will use them as suggested in the Help section:
- 1 partition / DASD for '/'
- 1 partition / DASD for '/home'

So select 'TARGET' from the menu and you'll get the following screen:


(Yes, I know the size shows up incorrectly, but don't worry about that...)
Select the first available partition (/dev/dasda1) as the target for our root partition.

Now we get the following options for creating a file system on the partition:


Since we're working with virtual devices, a quick format will suffice here, so select 'FORMAT' and we will be shown the following options:


Here we decide which file system to use. Again, we're using a virtual device that's on a real drive of our host system. Using a journaling file system here would cause double journaling. Unless you pretend to save precious data on your mainframe, I suggest using ext2 on your virtual storage to gain some performance.
So choose 'ext2' on this menu and we go to the next point of decision:


Just press Enter for the default inode size of 4096 as suggested, and enjoy the following screen for a while (will take just a minute or two):


After a few moments, we'll see the following menu, giving us the option to select another partition:


As mentioned before, I created a second partition for our '/home' directory, so select the free '/dev/dasdb1' partition now.
Again, select the quick 'FORMAT', the 'ext2' file system and the '4096' inode size.
After formatting our second partition, we are asked where we want to mount it:


Enter '/home' here and press Enter.

We are presented with the lines that setup will put in our /etc/fstab file:


This ends the selection of our target.


Next post: Selecting the source media!

Labels: , , ,

Hercules and Slackware (slack/390) - Part 6

...Continuing from Part 5

Preparing our DASDs

Before we can install Slack/390 on our local storage, we need to format and partition our devices, just like on a normal desktop.

Remember we created two DASDs and that in GNU/Linux they are called /dev/dasda and /dev/dasdb
The partitions on /dev/dasda will be named /dev/dasda1, /dev/dasda2, etc.

We log in as root in our telnet session and start to work!

1) Formatting DASDs

Slack/390 comes with a special utility to format out DASDs called dasdfmt
Let's format our first device:
# dasdfmt -b 4096 -f /dev/dasda
- -b 4096 defines the block size
- -f /dev/dasda defines our first DASD

When asked if we are sure, answer 'yes'.

After a short pause (after all, our drives are compressed, so there is not much to do), we'll see the following result:

Finished formatting the device.
Rereading the partition table... ok

Repeat the same procedure for our second DASD:
# dasdfmt -b 4096 -f /dev/dasdb

Again, answer with 'yes' and wait for the result.

2) Partitioning DASDs

The partitioning program for DASDs is very similar to fdisk, so experienced Slackware installers should have no problem at all here.

Start the utility with:
# fdasd /dev/dasda

The usual menu comes up:


- type 'n' to create a new partition
- press enter to accept the default starting cylinder
- press enter to accept the default last cylinder
- press 'w' to write the partition table to the DASD and exit

We just created a single partition of the type 'linux' occupying the whole device.

In a real-world situation we would create a swap partition, but since we're on an emulator, this is a bit useless.

Repeat the same procedure for our second DASD:
# fdasd /dev/dasdb
- type 'n' to create a new partition
- press enter to accept the default starting cylinder
- press enter to accept the default last cylinder
- press 'w' to write the partition table to the DASD and exit


Next post
: Entering setup!

Labels: , , ,

Thursday, November 20, 2008

Hercules and Slackware (slack/390) - Part 5

...Continuing from Part 4

Getting ready for our first IPL

Yes, we're really almost there :-)

1) Checking the virtual network adapter

There is still one small problem.
Hercules emulates a network adapter, but of course it only exists virtually. In the hercules.cnf file we defined that is uses /dev/net/tun
This is a virtual network tunnel used in many emulators and VPNs.

Check on your host system if you have the /dev/net/tun device. If you don't, you can dynamically load the kernel module for it:
# modprobe tun

Instead of loading it manually after every boot, you can add it to your /etc/rc.d/rc.local script or any other way you prefer.

2) Starting Hercules

Change to your (install) directory and start hercules from the command line:

# cd (install)
# hercules

You'll see the Hercules command console we saw in part 1 of these posts, and if everything worked out fine, you should see these lines:

...
HHCDA020I ./dasd/3390.SLACK.0120 cyls=3339 heads=15 tracks=50085 trklen=56832
HHCDA020I ./dasd/3390.SLACK.0121 cyls=3339 heads=15 tracks=50085 trklen=56832
HHCLC073I 0F00: TAP device tap0 opened
...
Command ==>

The two lines showing the DASDs tell us that both files were found without problems.
The third line shows us that the 'tap' adapter was found as well.

3) IPLing into the kernel

Now we're ready for our first IPL (Initial Program Load, or 'boot' of the mainframe).

At the Hercules 'Command ==>' prompt, type:
ipl c
and Enter.
- ipl is the command to do the Initial Program Load
- c is the device we will load our initial program from (remember we defined 000c as our virtual card reader in hercules.cnf)

A lot of text will scroll by, just as when we boot our Linux desktop.
When the ram disk is loaded, the text will pause while the contents is being uncompressed:

RAMDISK: Compressed image found at block 0

When the network is being configured, you will see this message:

----------------------------------------------------------------------
Starting the Slack/390 S/390 initrd to configure networking, version 0.71
----------------------------------------------------------------------

Afterwards, the network is tested by pinging the local (emulated) adapter, the gateway and the name server.

Then the DASDs are connected and several file system modules are loaded.

If everything works fine, you'll see the following message:


4) Testing the network and connecting through telnet

Open a second console on your host and try to ping your new mainframe:
$ ping -c 3 192.168.1.162

It should respond normally, so let's connect to it with telnet:
$ telnet 192.168.1.162

The result should be:


This is just like booting a Slackware CD or DVD, just a bit different ;-)


Next post: formatting and partitioning our storage...

Labels: , , ,

Hercules and Slackware (slack/390) - Part 4

...Continuing from Part 3

Defining kernel boot-parameters

OK, so Hercules is configured the way we need.
But to be able to boot the Slack/390 kernel, we need to set some parameters.
It is more or less like setting boot-time parameters in your lilo.conf file, only a bit different :-)

The standard parmfile.txt came with only one (but very important) line:
ramdisk_size=22528 root=/dev/ram0 ro ip=off
This line defines the size of the ram disk and that our root will be found on /dev/ram0 (and mounted read-only)

But just booting the kernel won't get us anywhere. We need an interface to the outside world to install Slack/390 over NFS.

In the (download)/kernels directory we have a file called 'parmfile.values.txt' that explains all options, but to avoid suffering, I'll tell you here how I did it :-)

1) Basic parameters

DASD=120-121
This line tells us where (device numbers again) the DASDs are.

HOST=herc-slack.hn:eth0:192.168.1.162:1500
This line defines our host (actually the guest, as we are working in Hercules, not a real machine):
- herc-slack.hn is our Fully Qualified Domain Name (hostname.domain)
- eth0 is the name of our network interface
- 192.168.1.162 is our ip address
- 1500 is our MTU (Maximum Transfer Unit)

NETWORK=192.168.1.0:255.255.255.0:192.168.1.255:192.168.1.1
Here we define the rest of our network parameters, like we normally do in /etc/rc.d/rc.inet1.conf:
- 192.168.1.0 is our network subnet
- 255.255.255.0 is our network mask
- 192.168.1.255 is our broadcast address
- 192.168.1.1 is our gateway
You will need to adapt these values to your reality...

DNS=192.168.1.110
Speaks for itself... Again, adapt to your reality

SEARCHDNS=hn
The domain name you would normally put in your /etc/resolv.conf as 'search xxx'

2) Defining your network interface

Getting the network to communicate was a bit of a struggle, as the information is not always very clear. But in the end I got it working with these lines:

LCS=0xf00,1
This is the Lan Channel Station we defined in hercules.cnf
- 0xf00 is the device address
- 1 is the type (an OSA-2 adapter in LCS mode)

CHANDEV=noauto;lcs0,0xf00,0xf01
Here we repeat the device addresses of out LCS adapter...

QETHPARM=add_parms,0x04,0xf00,0xf01
And again, just in another format:
- 0x04 stands for channel type LCS

3) Sample parmfile.txt

Again, to save trouble and time, here is an example of a parmfile. Copy the text and save it as (install)/rdr/parmfile.txt, overwriting the downloaded file:

ramdisk_size=22528 root=/dev/ram0 ro ip=off
DASD=120-121
HOST=herc-slack.hn:eth0:192.168.1.162:1500
NETWORK=192.168.1.0:255.255.255.0:192.168.1.255:192.168.1.1
DNS=192.168.1.110
SEARCHDNS=hn
LCS=0xf00,1
CHANDEV=noauto;lcs0,0xf00,0xf01
QETHPARM=add_parms,0x04,0xf00,0xf01


OK, we're finished editing files!
In my next post, we'll do our first IPL into GNU/Linux!

Labels: , , ,

Hercules and Slackware (slack/390) - Part 3

...Continuing from Part 2

Configuring Hercules

So now we have Hercules installed and working and downloaded everything we need to install Slack/390 on it.

But first we need to configure our mainframe (tell the emulator which devices it needs to emulate, where they are, etc.).

Hercules uses a configuration file named hercules.cnf and looks for it in the directory it started from (but you can override the name and location with the -f option when starting Hercules).

You can find lots of information in the installed documentation (/usr/local/share/hercules/hercconf.html) so I'll just discuss some important details here you need to configure.

1) First we'll define the system parameters:

ARCHMODE ESA/390
Here we define the architecture we will emulate with Hercules. Since we're going to install Slack/390, we'll need the ESA/390 architecture here.

MAINSIZE 256
This defines the 'main storage size' (think of RAM) of your mainframe in MB. I use 256, which is enough for me and doesn't put a high load on my host system. Feel free to change this value depending on your needs and resources.

NUMCPU 1
Here you set the number of virtual CPUs for your emulated mainframe.
For me, one is enough, but you can try two if you like (even on a host with only one physical CPU!). If you need more than two emulated CPUs, you might have to recompile Hercules (see the documentation).

OSTAILOR LINUX
This parameter is just to suppress some unnecessary messages on the Hercules control panel when running GNU/Linux.

PANRATE SLOW
Here we define the refresh rate of the Hercules panel. 'SLOW' means 500 milliseconds, which is fine and reduces the load on the host system. If you define a faster rate here, you can get some funny effects for instance when your file system is checked during boot (the increasing line that shows the completion will scroll like crazy).

2) Now we'll define the hardware we have

In Hercules we configure devices by setting a 'Device number', a 'Device type' (mostly the original model numbers from IBM), and the file name on the host system.

I'll give the lines of a very basic configuration we can use to install Slack/390:

000C   3505   ./rdr/vminstall.image-2.4.26.gcc-3.3.4.img ./rdr/parmfile.txt ./rdr/initrd.gz autopad eof
Note: this is one line in hercules.cnf!
- 000C is the device number
- 3505 is the model number (a card reader)
- then follow a list of the three local file names
- autopad means all lines will be padded up to 80 characters (standard width for punched cards)
- eof signals the end of the 'deck' of cards.
We still need to alter the parmfile.txt... See below...

0120   3390   ./dasd/3390.SLACK.0120
0121   3390   ./dasd/3390.SLACK.0121

You might recognize the device numbers from my previous post, when we created the virtual DASDs. So this is where we define the 'disks' we'll use. GNU/Linux will recognize them as '/dev/dasda' and '/dev/dasdb'.
- 0120 & 0121 are the device numbers
- 3390 is the model number
- ./dasd/3390.SLACK.012[0/1] is the file name on the host

0F00,0F01 LCS   -n /dev/net/tun 192.168.1.162
- 0F00,0F01 are the devices numbers
- LCS stands for Lan Channel Station for Hercules to emulate an Ethernet adapter
- -n /dev/net/tun is the local device that points to your 'tun' adapter
- 192.168.1.162 is the IP address of your mainframe

This is all you need for a minimal Hercules configuration. You can add devices later as needed / wanted.

3) Sample hercules.cnf file
To prevent typing errors, you can copy the following lines and save them as 'hercules.cnf' in the (install) directory:

MAINSIZE  256
NUMCPU    1
OSTAILOR  LINUX
PANRATE   SLOW
ARCHMODE  ESA/390

# reader
000C    3505 ./rdr/vminstall.image-2.4.26.gcc-3.3.4.img ./rdr/parmfile.txt ./rdr/initrd.gz autopad eof

# dasd
0120    3390 ./dasd/3390.SLACK.0120
0121    3390 ./dasd/3390.SLACK.0121

# network
0F00,0F01 LCS -n /dev/net/tun 192.168.1.162


OK, we're getting closer to installing, but we still need to configure the kernel parameters.
See my next post to continue!

Labels: , , ,

Hercules and Slackware (slack/390) - Part 2

As promised, here are the first steps to get Slack/390 running on your Hercules emulator!

Preparation

0) Get Hercules installed & running
See my previous post if you don't have Hercules yet.

Note
I am a GNU/Linux user, but I know Hercules works under Windows and Mac OS X as well.
If you use one of them, some steps on this page might differ, but I'll leave this up to the reader to find out ;-)

1) Obtain a copy of Slack/390
I got mine from ftp://distro.ibiblio.org/pub but other sources are available.
Check the official Slack/390 site for other links.

Personally I did this installation with the -current version (which is equivalent to Slackware 10.1) but if you prefer the stable version, get 10.0.

To save some time downloading, get only the /kernels and /slackware directories.
From the /slackware directory, you can even skip the gnome, kde and kdei subdirectories, which are large and a bit useless on a terminal-only system.
(ok, it is possible to run KDE or GNOME on Hercules with a X-terminal, but that's too much trouble for me...)

The directory where you downloaded all this, I will call '(download)' from now on.

2) 'Export' the Slack/390 packages
Since we cannot simply insert a CD in our mainframe, we'll install over NFS.
This means that we need to 'export' the directory with the downloaded packages.

I won't write a NFS manual here, since there is enough information available in the man-pages and on the internet, but basically the steps are:
- include the (download)/slackware directory in /etc/exports
- restart NFS with '/etc/rc.d/rc.nfsd restart'

3) Prepare a directory on a file system for your new Slack/390 installation
We'll create some folders with the images to boot our mainframe and the images of our drives where we'll install Slack/390.
A basic installation is about 700MB, but make sure you have some extra space to play around afterwards.
I'll call this base directory (install) from now on.

Create the following directory structure:
$ mkdir (install)/rdr # Here we'll put files for our virtual reader
$ mkdir (install)/ptr # For output of a printer
$ mkdir (install)/dasd # Here we'll put our virtual DASDs (= 'drives')


4) Create two virtual Direct Access Storage Devices
The S/390 works with DASDs - think of hard drives to have an idea.
For our installation, we need to create these drives to have some storage space.

Hercules emulates several models of DASDs, and I selected the 3390-3, which has a capacity of just over 2GB. This is enough for a standard installation (remember we won't use KDE or anything else that takes up a lot of space).
I'll create a second DASD to be mounted as /home, so that we can put any extra stuff there.

A nice feature of Hercules is that is can use compacted DASD images, so that you won't use more than necessary on your host system. My complete installation is under 700MB.

These are the commands to create the two DASDs:
$ cd (install)/dasd
$ dasdinit -z -linux 3390.SLACK.0120 3390-3 SLW120
$ dasdinit -z -linux 3390.SLACK.0121 3390-3 SLW121

Of course, substitute '(install)' with your real path.

- '-z' is to create the 'zipped' or compacted images
- '-linux' is to make sure the DASDs will work under GNU/Linux
- '3390.SLACK.0120' is the name of the file we'll create
- '3390-3' is the model number to emulate
- 'SLW120' if the volume label

For the curious: '120' & '121' are the device numbers we'll configure in Hercules.

5) Prepare the virtual reader for IPL
We'll need to boot a kernel to start installing Slack/390.
On a 'normal' desktop, we'd use a CD, USB-stick, or whatever.
On our mainframe, we'll use the virtual reader.

We'll need to read three files: the kernel, an initial-ram-disk, and a file with some parameters.
Copy the following files from (download)/kernels to (install)/rdr:
- initrd.gz
- parmfile.txt
- vminstall.image-2.4.26.gcc-3.3.4.img


We're ready now to take this to the next level of complexity: editing the configuration files...
See my next post for an explanation and sample files.

Labels: , , ,

Hercules and Slackware (slack/390) - Part 1

Recently I renewed my interest in the IBM mainframe computers.
From a colleague I learned about a program called Hercules that emulates a complete IBM mainframe system, from the early S/360 to the newer z/Architecture machines.

I already knew that Linux runs on these machines, so I started imagining running Slack/390 (the official S/390 port of Slackware) on Hercules on my Slackware 12.1 box.
Something like this:


|


|


It took a bit more of an effort than expected, since there aren't any simple step-by-step instructions to install Slack/390 on Hercules available on the internet.

So, to help anyone interested, I decided to create this little HOW-TO page...

First a little guide to get Hercules working on your system:

UPDATE: You can now download pre-built Slackware packages for Hercules, see this post.

1) Go to your favorite sources directory (in my case ~/sources):
# cd ~/sources
2) Download the latest version from the Hercules site (use any downloader you prefer, I use wget):
# wget http://www.hercules-390.org/hercules-3.05.tar.gz
3) untar the package:
# tar -xzvf hercules-3.05.tar.gz
4) Go into the directory containing the sources:
# cd hercules-3.05
5) Check if we have all the right version (compiler, etc.):
# ./util/cvslvlck
6) Answer y when asked, logout & login again
7) Configure, compile & install:
# ./configure
# make
# make install

8) Test Hercules to see if it starts ok:
# hercules

If everything worked out fine, you should get a screen like this:


In my next post I'll explain how I installed Slack/390...

Labels: , , ,